
"Causes and Troubleshooting Methods for G6 Micro Switch Failures"
In electronic devices, a micro switch (Micro switch) is a critical but often overlooked component. When a G6 micro switch experiences poor contact or fails to respond, it can directly affect the normal operation of the device and may even cause complete system failure.
If you are looking for effective micro switch troubleshooting methods, this article will systematically cover:
Common failure symptoms
Causes of micro switch failures
Step-by-step troubleshooting methods
Practical solutions
This guide will help you quickly identify problems and restore proper device operation.
Common Micro Switch Failures
In real-world applications, micro switches typically show the following failure patterns:
Typical Symptoms
No response when pressed (micro switch not working)
Intermittent operation (contact instability)
Delayed response
Clicking sound but no conduction
These symptoms usually indicate that the internal contacts or mechanical structure of the micro switch are faulty.
Causes of G6 Micro Switch Failures
Understanding the causes of micro switch failures is the first step in troubleshooting.
1. Poor Contact of the Contacts
This is one of the most common issues, especially after long-term use.
Main reasons:
Contact wear
Reduced contact pressure
Uneven contact surfaces
Typical result: Micro switch shows poor contact or intermittent conduction.
2. Oxidation or Contamination of Contacts
Environmental factors can significantly affect micro switch performance:
Oxidation caused by moisture
Dust entering the switch
Increased contact resistance
Common environments: humid or industrial conditions.
3. Mechanical Sticking or Internal Obstruction
If pressing the switch feels abnormal, it’s usually a mechanical issue:
Bent spring plates
Internal debris blocking movement
Symptoms: switch does not press smoothly or fails to return.
4. Wiring or Solder Joint Problems
Many “failures” are not caused by the switch itself:
Loose or cold solder joints
Broken or detached wires
5. Electrical Shock or Overload
Improper usage can lead to severe damage:
Excessive current
Contact burning
Permanent switch failure
Micro Switch Troubleshooting Methods
Here is a practical micro switch troubleshooting guide, suitable even for beginners:
Step 1: Visual Inspection
Check for:
Burn marks or blackened areas
Broken casing
Sticking buttons
If visible damage is found, replace the micro switch immediately.
Step 2: Manual Test
Press the switch and observe:
Is there a clear “click” feedback?
Does it return smoothly?
No tactile feedback or sticking indicates internal mechanical failure.
Step 3: Multimeter Test
Use a multimeter to check continuity:
Pressed → should conduct
Released → should not conduct
No change → the micro switch is damaged.
Step 4: Check Wiring Connections
Pay attention to:
Solder joints’ firmness
Cold or loose joints
Broken wires
Many problems are not caused by the micro switch itself.
Step 5: Cleaning
For minor contact issues:
Use compressed air to clean
Use electronic cleaning agents
Note: Do not disassemble sealed micro switches.
Common Problems and Solutions Table
Symptom | Main Cause | Solution |
No response | Contact damage | Replace switch |
Intermittent operation | Oxidation/contamination | Clean or replace switch |
No tactile feedback | Mechanical damage | Replace switch |
Intermittent work | Wiring issue | Re-solder or reconnect |
Practical Troubleshooting Tips
To improve troubleshooting efficiency:
Check visual appearance first, then the circuit
Solve simple issues before complex ones
Prioritize checking wiring and connections
Experience shows that about 30% of micro switch failures originate from connection issues.
Why Choose High-Quality G6 Micro Switches
When replacement is required, choosing reliable products can significantly reduce failure rates.
ZINGEAR G6 Series Advantages
Compact design, ideal for space-constrained devices
Sensitive trigger and stable response
Good sealing, reduces dust and moisture effects
Suitable for home appliances, industrial equipment, and more
Using high-quality micro switches can greatly reduce maintenance costs and downtime
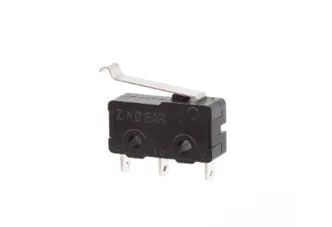
ZINGEAR G605-150S07A
How to Reduce Micro Switch Failures
Avoid exceeding rated current
Avoid high humidity or dusty environments
Regularly check connection reliability
Choose a stable and reliable micro switch brand
Conclusion
Although the G6 micro switch (Micro switch) is small, it is critical for device operation. Most failures are related to contacts, contamination, or connections.
By following a systematic micro switch troubleshooting method, you can quickly locate issues and take appropriate action. Choosing high-quality products is also key to reducing failure rates.
Request Samples or Quotes
If you are looking for:
Reliable micro switch suppliers
G6 micro switch selection support
Bulk purchasing and customization solutions
You are welcome to contact ZINGEAR for:
Fast quotation support
Professional application solutions
FAQ (Frequently Asked Questions)
1. What should I do if the micro switch clicks but does not respond?
Usually, this indicates contact oxidation or damage. Replace the micro switch.
2. Why does the micro switch work intermittently?
Most often due to poor contact or loose wiring. Check connections first.
3. Can micro switches be repaired?
Minor contamination can be cleaned, but most cases require replacement.
4. How to quickly determine if a micro switch is damaged?
Use a multimeter to test continuity—it is the most direct and effective method.
Tags: micro switch malfunction troubleshooting for poor switch contact switch replacement
Related Recommendations
-
ZINGEAR G5 Waterproof Micro Switch Durability Testing and Longevity Analysis | IP67 Reference
2026-05-07 -
G5 Micro Switch Full Guide (2026 Edition): Model Naming, Parameter Comparison, and Application Selection Guide
2026-05-12 -
G5 Micro Switch Dimensions & Drawing Parameters Guide (2026 Edition)
2026-05-14 -
ZINGEAR Micro Switch Manufacturers: Leading the Industry with Precision Manufacturing and Customized Solutions
2026-05-18 -
Tactile Switches vs. Membrane Switches: In-depth Analysis of Technical Paths and Application Selection
2026-05-21